You can join multiple tables from multiple data sources into a single virtual table,
which is also known as a join view.
Procedure
To create a virtual view from existing virtualized tables, complete the following steps.
- On the navigation menu, click to reveal the service menu.
The service menu opens to the
Data sources page by default.
- On the service menu, click
.
Your existing virtualized tables are listed.
- Select two tables that you want to join and click Join to display
the Join virtual objects window.
Tip: If you prefer, you can click to skip the following steps and use the IBM common SQL engine
instead. See the
SQL Reference for more details on SQL syntax and function
compatibility.
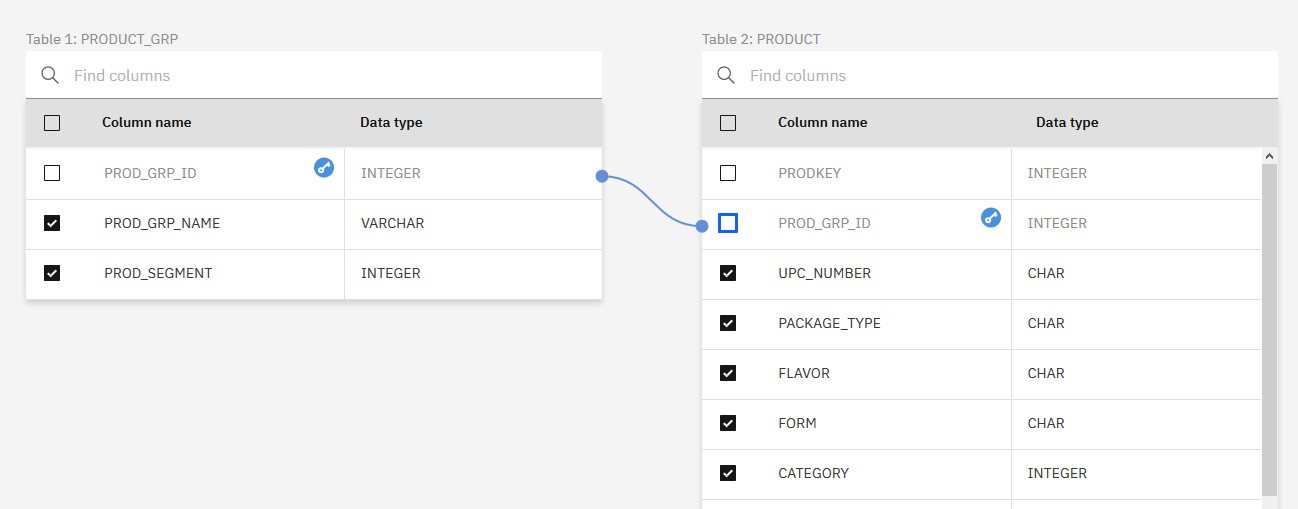
- Use the graphical join wizard to select at least one join key, which
consists of a pair of columns, of the same data type, from both of the virtualized tables. Then,
from each table, select the columns to include in the join results. This step does not copy or move
any data. It creates a table definition that is a combination of the two tables.
To create a join key by using only the keyboard, follow these steps:
- Press Enter to select a column name in a row in Table 1.
- Press the Tab key to navigate to a column name in a row in Table 2.
- Press Enter on the row in Table 2. The rows are joined.
Restrictions:
- If you are joining tables with many rows, the preview of the join might time out after
approximately 10 minutes if the data sources are unable to complete the processing of the join.
- You can join only two tables at one time. To join more than two tables, join two tables and get
a view. Then, join the view and the third table to get another view.
- Click Next. You can use the new table to query the data from both
of the base tables.
- On the Edit column names page, enter a View
name, select a Schema, and edit column names as needed.
- Select the appropriate sharing options for the view.
-
Click Create view to complete the process.
What to do next
You can use the virtualized data in a number of different ways. For example, you can use
them in a Jupyter Notebook, create new models within the Model Builder, or build charts or graphics
on the analytics dashboard.
