Parts of a notebook
A notebook comprises cells that contain code or textual information and various other elements that help you interact with the code. Depending on whether a notebook is in edit mode, the list of interactive elements might include the menu bar, the main toolbar, the action bar, the progress bar, an automatically-generated table of contents, and a debugger.
When you open a notebook in view mode, the only available elements are the cells and the action bar. You can use it to run, schedule, share, download, or view information about your notebook. To access additional options, click the Edit icon to switch to the edit mode.
When you open a notebook in edit mode, the notebook editor includes the following elements:
- Menu bar and toolbar
- Table of Contents
- Notebook action bar
- Cells that contain code or textual information
- Debugger
- Spark job progress bar (for notebooks that run in a Spark environment)
Menu bar and toolbar
From the menu bar and the main toolbar, you can select notebook features that affect the way that the notebook functions and perform the most-used operations within the notebook.

Table of Contents
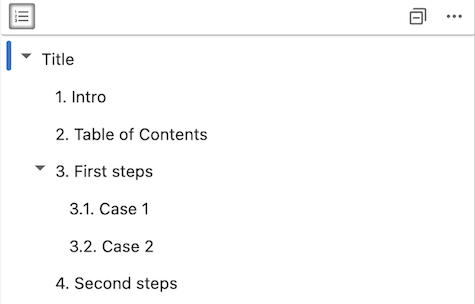
You can navigate the notebook by using an automatically generated Table of Contents that is based on your notebook's headings. To view the Table of Contents, from the View menu, select Table of Contents.
To add heading numbers, click the Show heading number in the document icon. To toggle whether or not a number is visible next to first-level headings (h1), for example when you want your first-level heading to be shown as the notebook title, click the More actions button, and select Show first-level heading number.
To exclude or include headings that were generated as part of cell output from the Table of Contents, click the More actions button, and select Show output headings.
Notebook action bar
You can select features that enhance notebook collaboration. From the action bar, you can:
- Publish your notebook as a gist or on GitHub
- Create a permanent URL so that anyone with the link can view your notebook
- Create jobs in which to run your notebook. See Scheduling a notebook
- Download your notebook
- Add a project token so that code can access the project resources. See Adding code to set the project token
- Generate code snippets to add data from a data asset or a connection to a notebook cell
- View your notebook information and interact with the environment it is running in
- Save versions of your notebook
- Upload assets to your project

Cells in a Jupyter notebook
A Jupyter notebook consists of a sequence of cells. The flow of a notebook is sequential. You enter code into an input cell, and when you run the cell, the notebook executes the code and prints the output of the computation to an output cell.
You can change the code in an input cell and re-run the cell as often as you like. This way, the notebook follows a read-evaluate-print loop paradigm.
Each cell has its own mini toolbar.

Directly from the cell toolbar, you can:
- Copy the cell
- Move the cell up or down
- Add a new cell before and after another cell
- Delete the cell
To collapse a cell, click on the Collapser button ![]() that is next to each cell. To expand a cell, click on the collapser
button or on the Expand icon
that is next to each cell. To expand a cell, click on the collapser
button or on the Expand icon ![]() .
.
The behavior of a cell is determined by a cell’s type. The different types of cells include:
Jupyter code cells
In Jupyter code cells you can edit and write new code.

To show line numbers next to your code, from the View menu select Show Line Numbers.
To view your code cell and output cell side-by-side, go to View in the Editor menu and click Render Side-by-side.
Jupyter markdown cells
In Jupyter markdown cells you can document the computational process. You can input headings to structure your notebook hierarchically.
You can also add and edit image files as attachments to the notebook. The markdown code and images are rendered when the cell is run.
Raw Jupyter NBConvert cells
Raw cells are not evaluated by the notebook. A raw cell is useful if you're looking for a place to keep content that you don't want to run, like generated output.
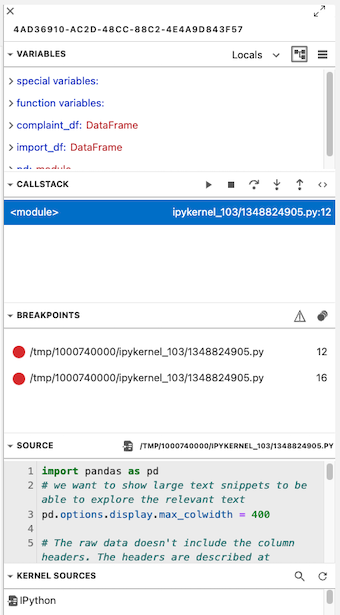
Debugger
The debugger can help you quickly fix code-related issues. To activate the debugger:
- Click on the Enable Debugger icon
 in the notebook toolbar.
 - Click next to any line of code to add a breakpoint.
To debug your code, from the View menu, select Right Sidebar, and then select Show Debugger.
Spark job progress bar
When you run code in a notebook that triggers Spark jobs, it is often challenging to determine why your code is not running efficiently.
To help you better understand what your code is doing and assist you in code debugging, a notebook can monitor the execution of the Spark jobs for a code cell.
To enable Spark monitoring for a cell in a notebook:
- Select the code cell that you want to monitor.
- Click the Enable Spark Monitoring icon
 in the notebook toolbar.
The progress bars that you see display the real time runtime progress of your jobs on the Spark cluster. Each Spark job runs on the cluster in one or more stages, where each stage is a list of tasks that can be run in parallel. The monitoring pane can become very large if the Spark job has many stages.
The job monitoring pane also displays the duration of each job and the status of the job stages. A stage can have one of the following statuses:
Running: Stage is active and startedCompleted: Stage is completedSkipped: The results of this stage were cached from an earlier operation and so the task doesn't have to run againPending: Stage not started yet
Click the icon again to disable monitoring in a cell.
Parent topic: Jupyter Notebook editor