Quick start: Curate data
You can quickly curate data by importing information for selected data sets in a data source and then publishing the resulting data assets to a catalog. Read about data curation, then watch a video and take a tutorial that’s suitable for users with some knowledge of data curation, but does not require coding.
Required roles You must have the Admin or Editor role in a project and the Admin or Editor role the target catalog.
Required services Watson Knowledge Catalog
Your basic workflow includes these tasks:
- Create a project. See Create a project.
- Create a connection to an external data source. See Adding connections to projects.
- Create a Metadata Import asset to configure the import details, run the import job, and publish the assets to your catalog.
Read about data curation
You can import metadata associated with the data assets in your organization into a project or a catalog to inventory, evaluate, and catalog these assets. This metadata helps users decide whether the data is appropriate for the task at hand, whether they can trust the data, and how to work with the data.
The metadata that you import can later be enriched with other information to help users find data faster and use it with confidence. Such information includes, for example, terms that define the meaning of the data, rules that document ownership or determine quality standards, or reviews.
When you import metadata, you add data assets to a project or a catalog. If you import the assets to a project, they are not visible in any catalog until you publish them. After you share them to a catalog, other catalog users can work with these assets.
Read more about metadata import
Watch a video about importing asset metadata
 Watch this video to see how to import asset metadata from an external data source.
This video provides a visual method as an alternative to following the written steps in this documentation.
Try a tutorial to import asset metadata
Create a metadata import asset in an existing project, run a job, and then add select assets to a catalog.
In this tutorial, you will complete these tasks:
- Task 1: Create a project.
- Task 2: Import metadata to a project.
- Task 3: Define a data scope.
- Task 4: Schedule and complete the import.
- Task 5: View the results of the import and publish assets to the catalog.
This tutorial will take approximately 20 minutes to complete.
Prerequisites
-
A previously created catalog or access to create a catalog.
-
Credentials for your Cloud Object Storage instance.
-
In the Cloud Pak for Data Menu, click Services > Service instances.
-
Click the icon next to the Cloud Object Storage instance and, if necessary, log in to IBM Cloud.
-
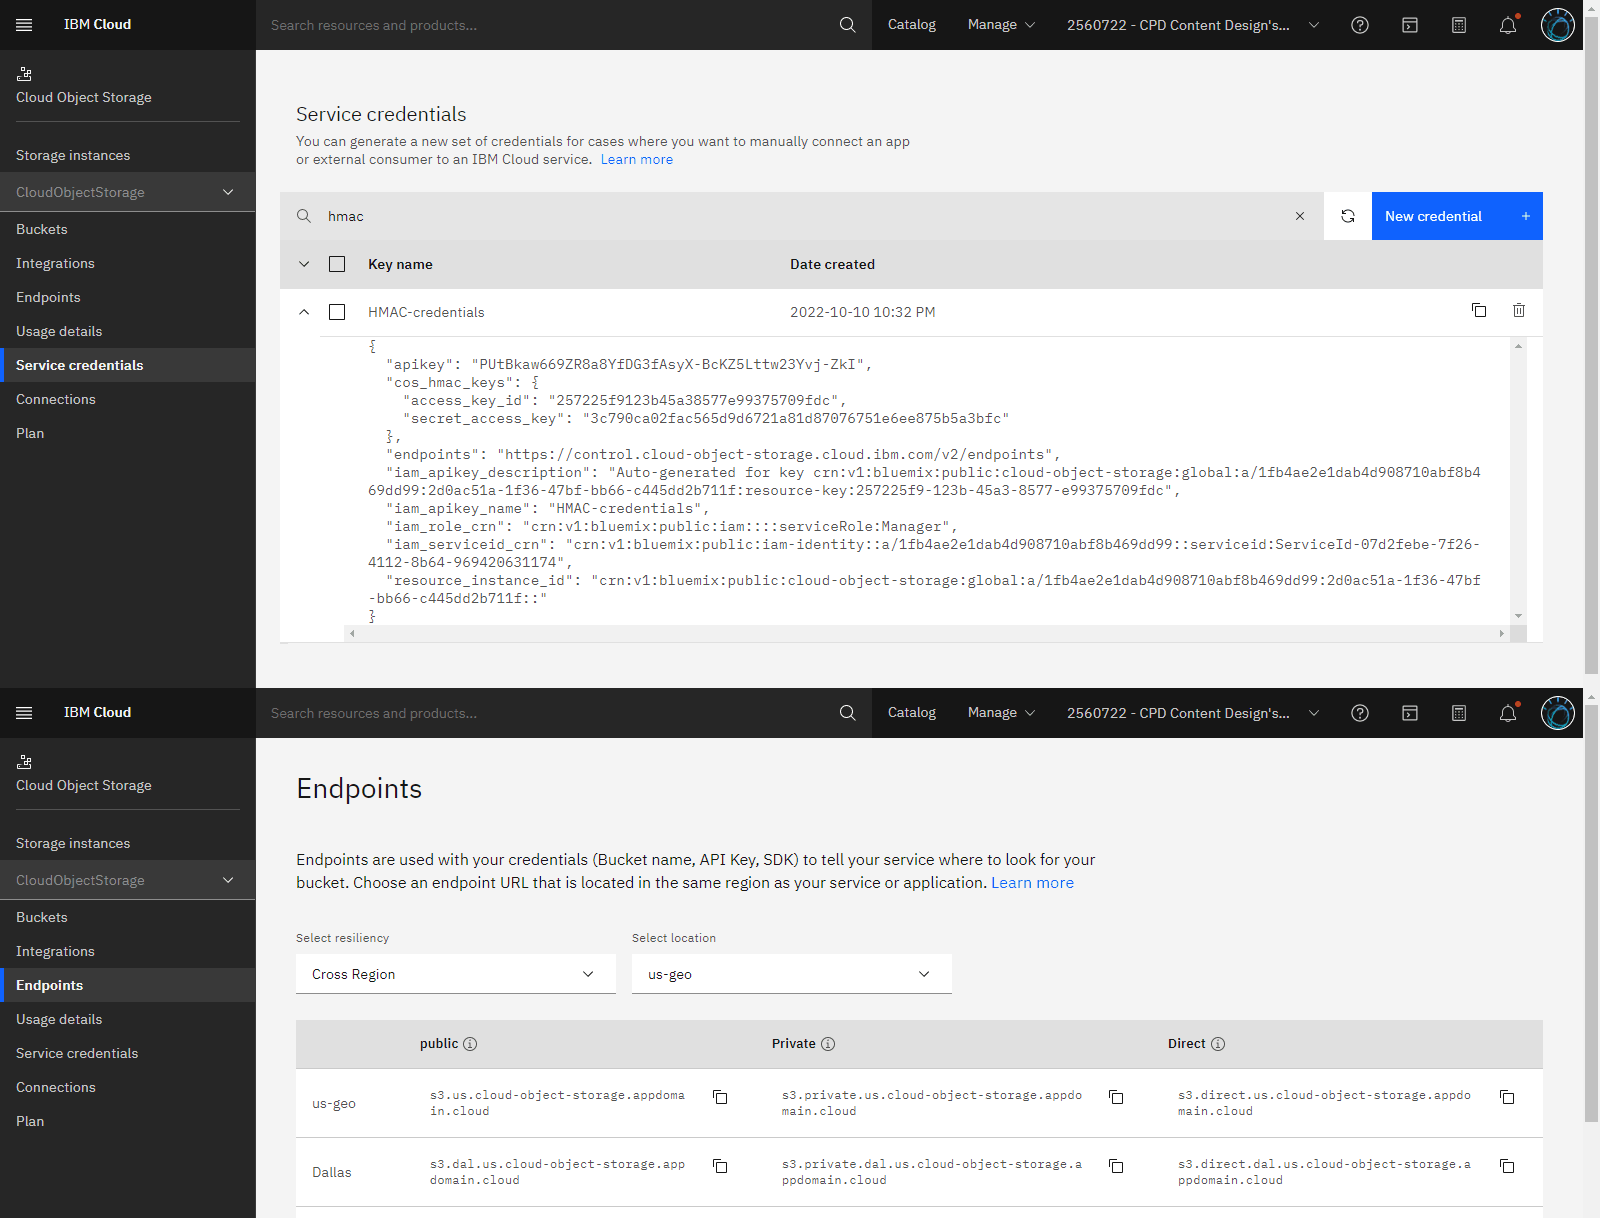
On the Cloud Object Storage service instance page, select the Service credentials panel to view your credentials. If you have more than one set of credentials listed, select credentials that include
cos_hmac_keys. You will need to supply these credentials later in this tutorial. -
Select the Endpoints panel.
-
Select your location, for example, us-geo.
-
Copy the public login URL, for example,
https://s3.us.cloud-object-storage.appdomain.cloud.
Check your progress
The following image shows the Cloud Object Storage HMAC credentials and endpoints.
-
-
A sample project with data sets loaded into your Cloud Object Storage instance.
 To preview this task, watch the video beginning at 00:07.
-
Access the Insurance Pricing Optimization Project.
-
Click Create project.
-
The name, description, and storage will be filled in for you. Click Create.
-
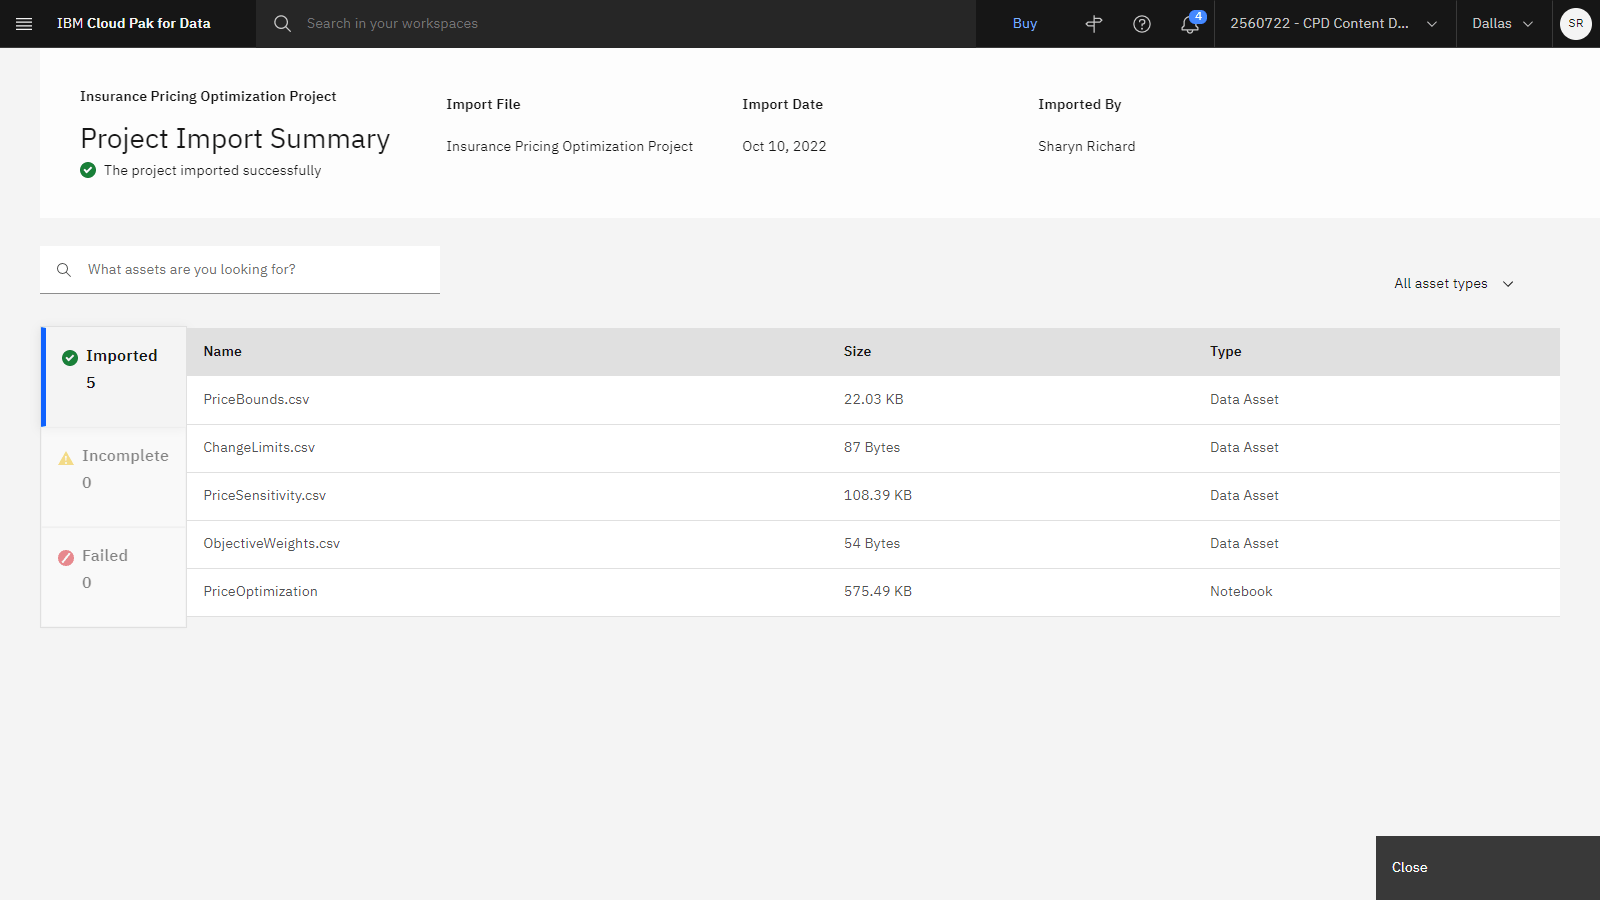
Click View import summary. The data files on the Assets tab in the project have been added to your Cloud Object Storage instance.
-
 Check your progress
The following image shows the imported project.
Task 1: Create a project
You need a project to store the import metadata asset and the discovered assets. Follow these steps to create the project:
-
From the Cloud Pak for Data navigation menu
, choose Projects > View all projects
-
If you have an existing project, open it.
-
If you don't have an existing project, then click New project.
-
Select Create an empty project.
-
Enter a name and optional description for the project.
-
Choose an existing object storage service instance or create a new one.
-
Click Create.
For more information or to watch a video, see Creating a project.
For more information on Cloud Object Storage, see Object storage.
 Check your progress
The following image shows a new, empty project.

Task 2: Import metadata to a project
 To preview this task, watch the video beginning at 00:20.
Follow these steps to create the metadata import asset and specify the connection for the import:
-
In your project, click Add to a project > Metadata Import.
-
On the Define details page, provide a name for your import. The description is optional. Click Next.
-
On the Select target page, you can choose to import metadata into a project or a catalog. In this tutorial, select This project, and then click Next. Later you will publish specific assets to a catalog.
-
On the Select scope page, click Select connection.
-
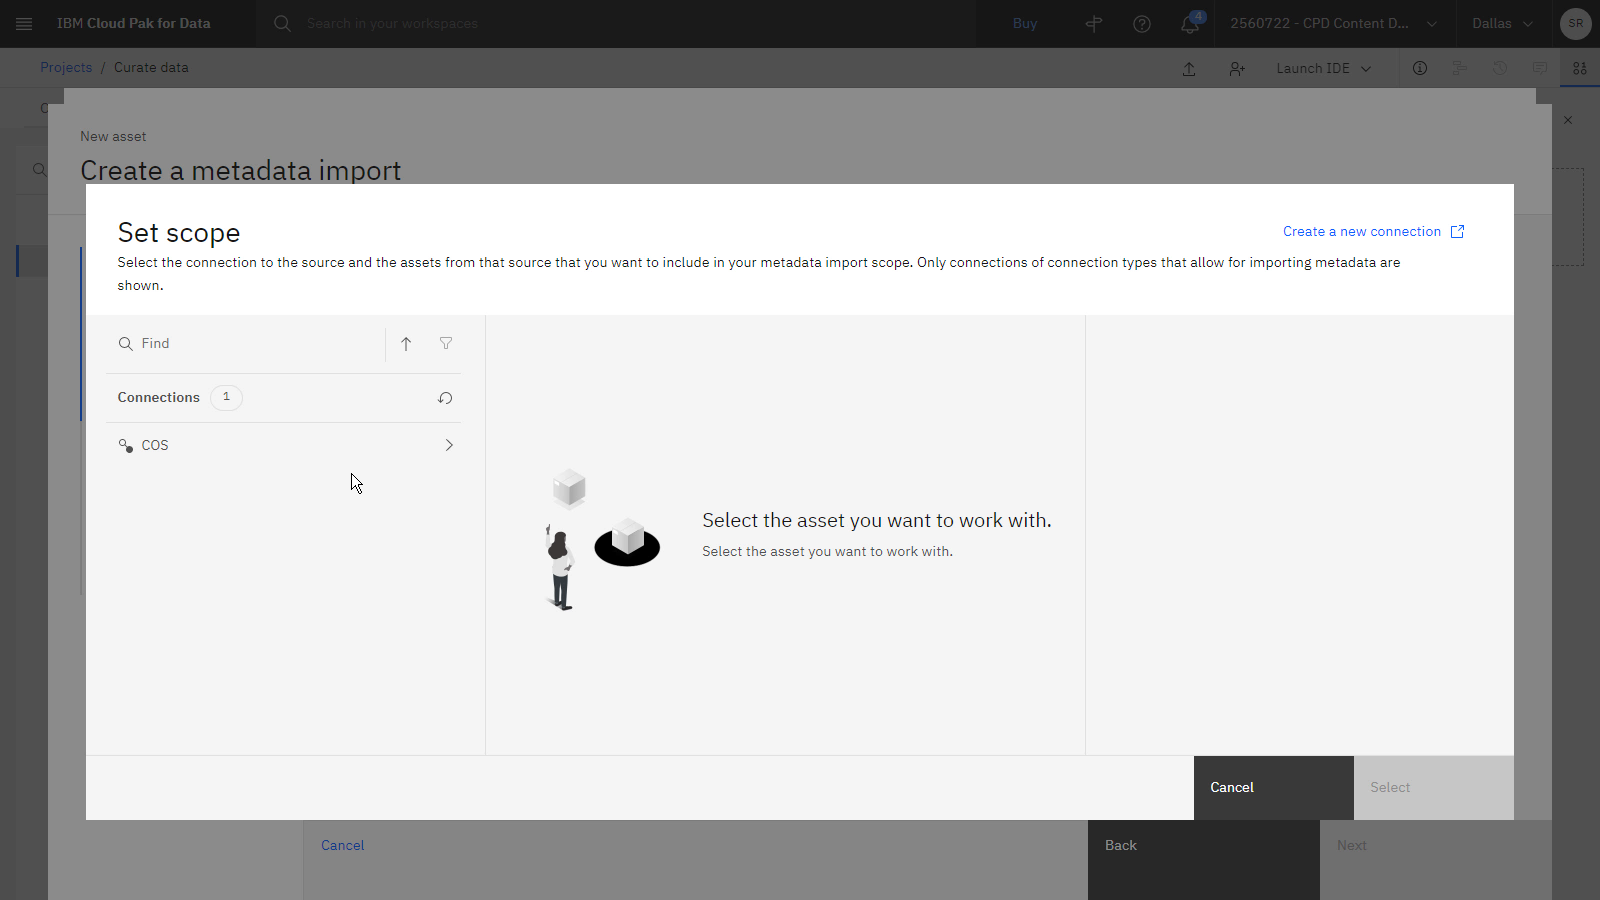
In the Set scope window, click Create a new connection.
-
You can import metadata from the data sources listed. For this tutorial, select IBM Cloud Object Storage, and click Select.
-
Provide a name, description, and the connection details using the credentials from your Cloud Object Storage instance gather as a prerequisite to this tutorial.
-
Click Create to create the connection. This new connection will be listed in the Set scope window.
-
 Check your progress
The following image shows the Set scope window with the Cloud Object Storage connection listed.
Task 3: Define a data scope
 To preview this task, watch the video beginning at 01:25.
Follow these steps to define which assets to import from the connection:
-
In the Set scope window, select your Cloud Object Storage connection.
-
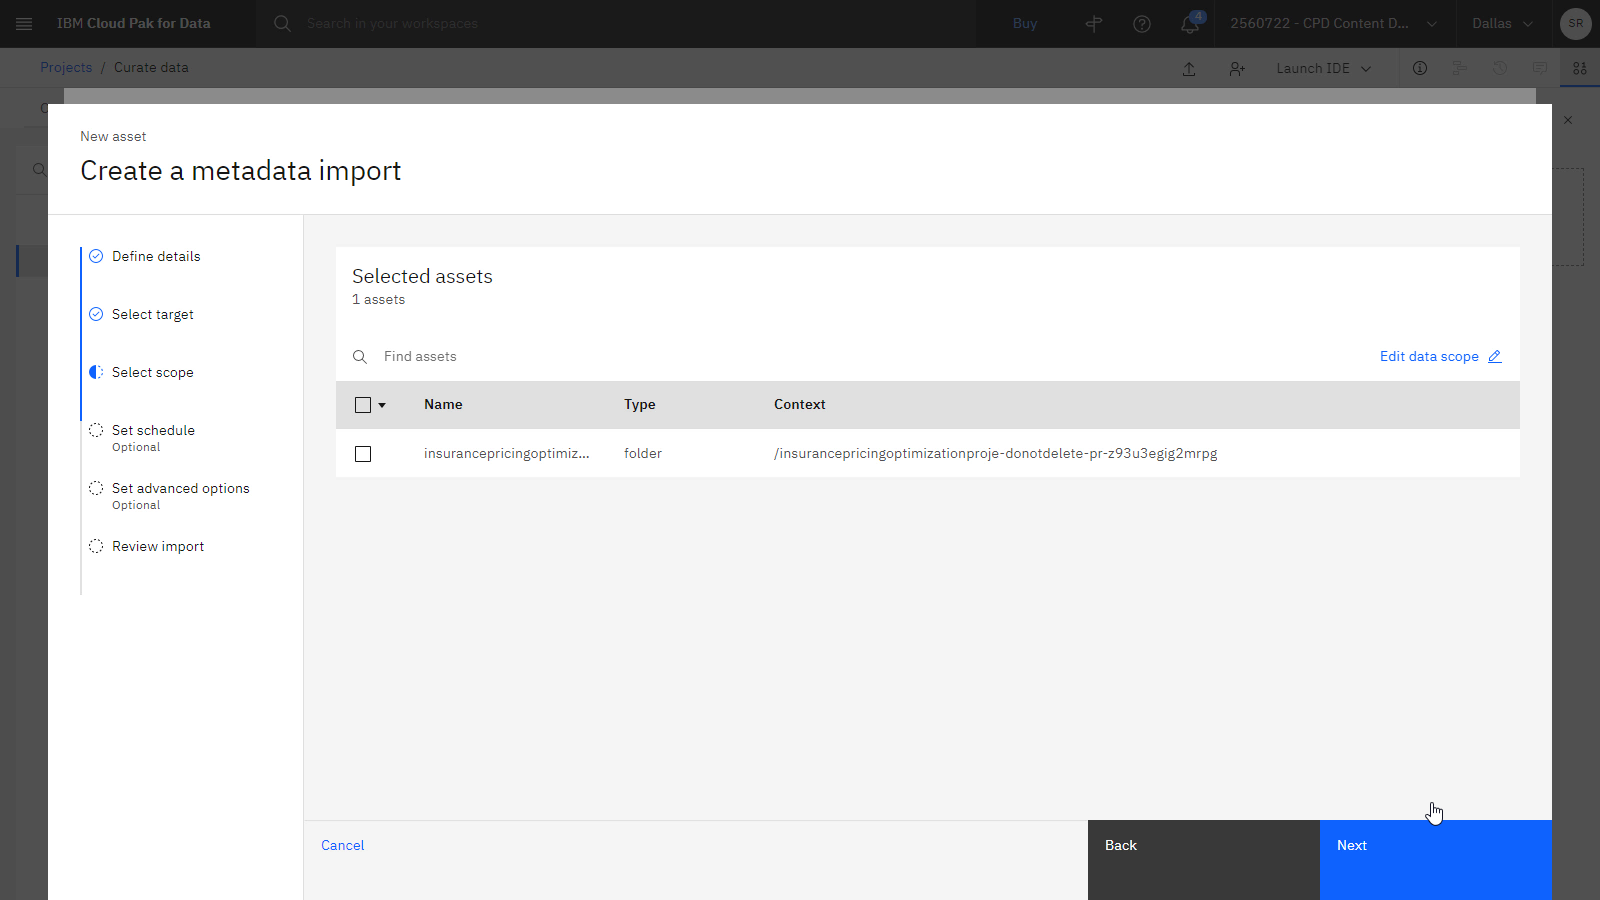
You can select all the schemas or just select schemas or tables to import. Select the insurancepricingoptimization folder to see how many items it contains.
-
Select the checkbox next to the insurancepricingoptimization folder to define the scope as all assets in that folder.
-
Click Select to continue defining the metadata import asset.
-
Click Next to continue to the schedule.
 Check your progress
The following image shows the Select scope page of the Metadata import asset.
Task 4: Schedule and complete the import
 To preview this task, watch the video beginning at 01:52.
Follow these steps to specify to run the import now or schedule it for a later date:
-
(Optional) Modify the default job name.
-
(Optional) Select the Schedule off toggle to specify start and repeat details.
-
Click Next to continue to Set advanced options.
-
Accept the defaults for the Advanced options, and click Next.
-
Review the summary of the import, and click Create.
-
The metadata import job will start or it will run at the scheduled time.
 Check your progress
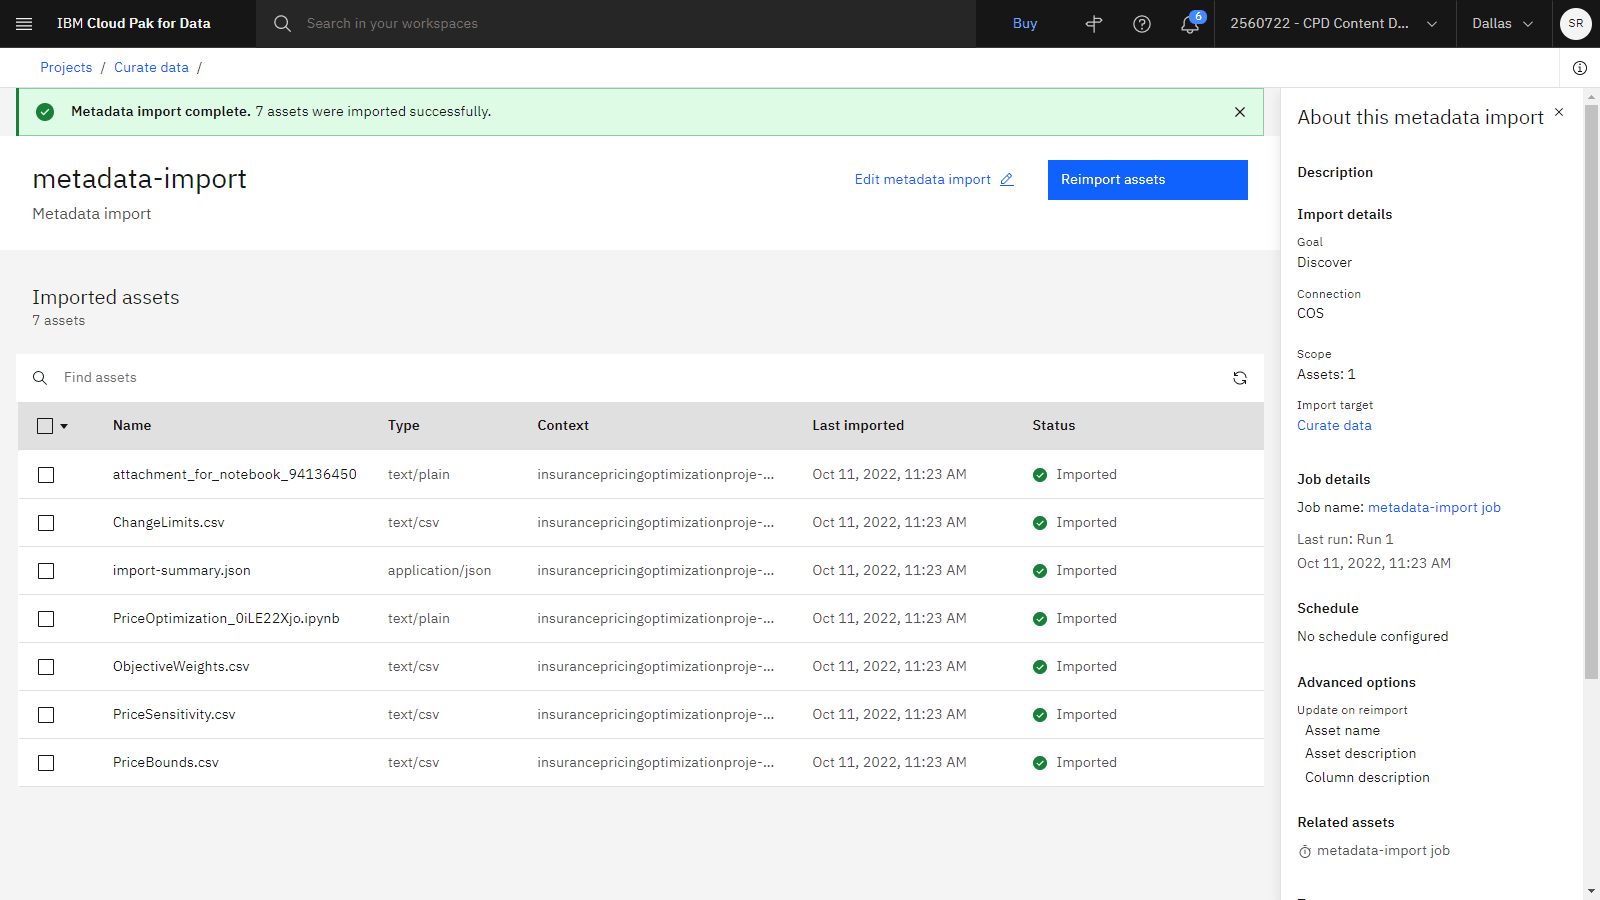
The following image shows the results of the metadata import.
Task 5: View the results of the import and publish assets to the catalog
 To preview this task, watch the video beginning at 02:38.
When the job run is complete, the list of imported assets will display. Follow these steps to view the results of the import and publish assets to a catalog:
-
Select one or more csv files from the list, and click Publish.
-
Select the Target catalog, provide a description and tags (for example,
curated), and then click Publish. -
Navigate to the catalog. From the Cloud Pak for Data navigation menu
, choose Catalogs > View all catalogs.
-
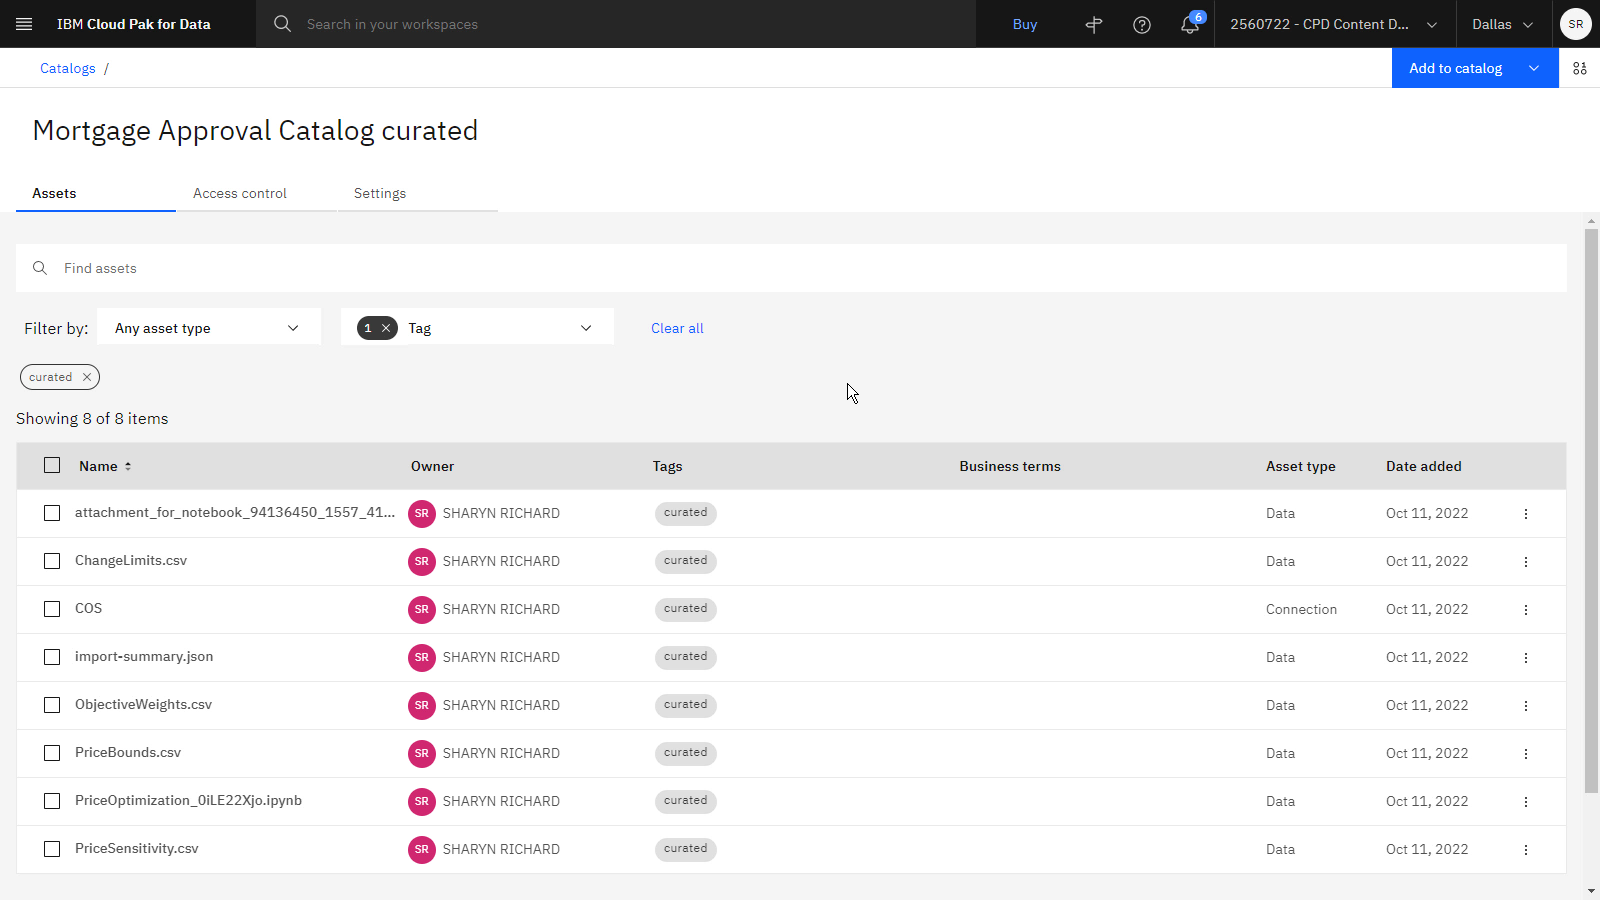
View the Recently added tab to see the curated assets, or filter the assets by the tag you assigned.
 Check your
progress
The following image shows the imported assets in a catalog.
Next steps
Now the data is ready to be used. For example, you or other users can do any of these tasks:
- Cleansing and shaping data
- Analyze the data in a notebook
- Build and train a model with the data asset
- Visualize the data with a dashboard
Additional resources
- View more videos for Watson Knowledge Catalog.
- Find sample data sets to gain hands-on experience refining data in the Gallery.
- Try this additional tutorial which provides additional hands-on experience with Watson Knowledge Catalog: Find, prepare, and understand data with Watson Knowledge Catalog

Parent topic: Quick start tutorials