To refine data, you take it from one location, cleanse and shape it, and then write the result into a different location. You can cleanse and shape tabular data with a graphical flow editor tool called Data Refinery.
When you cleanse data, you fix or remove data that is incorrect, incomplete, improperly formatted, or duplicated. When you shape data, you customize it by filtering, sorting, combining or removing columns.
You create a Data Refinery flow as a set of ordered operations on data. Data Refinery includes a graphical interface to profile your data to validate it and over 20 customizable charts that give you insights into your data.
- Required service
- watsonx.ai Studio or IBM Knowledge Catalog
- Data format
- Avro, CSV, JSON, Microsoft Excel (xls and xlsx formats. First sheet only, except for connections and connected data assets.), Parquet, SAS with the "sas7bdat" extension (read only), TSV (read only), or delimited text data asset
- Tables in relational data sources
- Data size
- Any. Data Refinery operates on a sample subset of rows in the data set. The sample size is 1 MB or 10,000 rows, whichever comes first. However, when you run a job for the Data Refinery flow, the entire data set is processed. If the Data Refinery flow fails with a large data asset, see workarounds in Troubleshooting Data Refinery.
For more information on choosing the right tool for your data and use case, see Choosing a tool.
- Prerequisites
- Source file limitations
- Target file limitations
- Data protection rules
- Data set previews
- Refine your data
Prerequisites
Before you can refine data, you need to create a project that uses Cloud Object Storage.
Watch this video to see how to create a project
This video provides a visual method to learn the concepts and tasks in this documentation.
If you have data in cloud or on-premises data sources, you'll need to either add connections to those sources or you'll need to add data assets from each connection. If you want to be able to save refined data to cloud or on-premises data sources, create connections for this purpose as well. In Data Refinery, source connections can be used only to read data; target connections can be used only to write data. When you create a target connection, be sure to use credentials that have Write permission or you won't be able to save your Data Refinery flow output to the target.
Watch this video to see how to create a connection and add connected data to a project
This video provides a visual method to learn the concepts and tasks in this documentation.
Source file limitations
CSV files
Be sure that CSV files are correctly formatted and conform to the following rules:
- Two consecutive commas in a row indicate an empty column.
- If a row ends with a comma, an additional column is created.
If your CVS file contains any malicious payload (formulas for example) in an input field, these items might be executed.
White-space characters are considered as part of the data
If your data includes columns that contain white space (blank) characters, Data Refinery considers those white-space characters as part of the data, even though you can't see them in the grid. Some database tools might pad character strings with white-space characters to make all the data in a column the same length and this change affects the results of Data Refinery operations that compare data.
Column names
Be sure that column names conform to the following rules:
- Duplicate column names are not allowed. Column names must be unique within the data set. Column names are not case-sensitive. A data set that includes a column name "Sales" and another column name "sales" will not work.
- The column names are not reserved words in the R programming language.
- The column names are not numbers. A workaround is to enclose the column names in double quotation marks ("").
Data sets with columns with the "Other" data type are not supported in Data Refinery flows
If your data set contains columns that have data types that are identified as "Other" in the watsonx.ai Studio preview, the columns will show as the String data type in Data Refinery. However, if you try to use the data in a Data Refinery flow, the job for the Data Refinery flow will fail. An example of a data type that shows as "Other" in the preview is the Db2 DECFLOAT data type.
Target file limitations
The following limitation applies if you save Data Refinery flow output (the target data set) to a file:
- You can't change the file format if the file is an existing data asset.
Data protection rules
Data Refinery does not support data protection rules for row filtering. Data Refinery jobs might fail if the asset is governed by row filtering data protection rules. Additionally, if you add an asset from IBM Knowledge Catalog to a project that is governed by row-filtering data protection rules, the masking will not be enforced in Data Refinery. For information, see Data protection rules enforcement.
Data set previews
Data Refinery provides support for large data sets, which can be time-consuming and unwieldy to refine. To enable you to work quickly and efficiently, it operates on a subset of rows in the data set while you interactively refine the data. When you run a job for the Data Refinery flow, it operates on the entire data set.
Refine your data
The following video shows you how to refine data.
This video provides a visual method to learn the concepts and tasks in this documentation.
-
Video transcript Time Transcript 00:00 This video shows you how to shape raw data using Data Refinery. 00:05 To get started refining data from a project, view the data asset and open it in Data Refinery. 00:14 The "Information" pane contains the name for the data flow and for the data flow output, once you've finished refining the data. 00:23 The "Data" tab shows you a sample set of the rows and columns in the data set. 00:29 To improve performance, you won't see all the rows in the shaper. 00:33 But rest assured that when you are done refining the data, the data flow will be run on the full data set. 00:41 The "Profile" tab shows you frequency and summary statistics for each of your columns. 00:49 The "Visualizations" tab provides data visualizations for the columns you are interested in. 00:57 Suggested charts have a blue dot next to their icons. 01:03 Use the different perspectives available in the charts to identify patterns, connections, and relationships within the data. 01:12 Now, let's do some data wrangling. 01:17 Start with a simple operation, like sorting on the specified column - in this case, the "Year" column. 01:27 Say you want to focus on delays just for a specific airline so you can filter the data to show only those rows where the unique carrier is "United Airlines". 01:47 It would be helpful to see the total delay. 01:50 You can do that by creating a new column to combine the arrival and departure delays. 01:56 Notice that the column type is inferred to be integer. 02:00 Select the departure delay column and use the "Calculate" operation. 02:09 In this case, you'll add the arrive delay column to the selected column and create a new column, called "TotalDelay". 02:23 You can position the new column at the end of the list of columns or next to the original column. 02:31 When you apply the operation, the new column displays next to the departure delay column. 02:38 If you make a mistake, or just decide to make a change, just access the "Steps" panel and delete that step. 02:46 This will undo that particular operation. 02:50 You can also use the redo and undo buttons. 02:56 Next, you'd like to focus on the "TotalDelay" column so you can use the "select" operation to move the column to the beginning. 03:09 This command arranges the "TotalDelay" column as the first in the list, and everything else comes after that. 03:21 Next, use the "group_by" operation to divide the data into groups by year, month, and day. 03:32 So, when you select the "TotalDelay" column, you'll see the "Year", "Month", "DayofMonth", and "TotalDelay" columns. 03:44 Lastly, you want to find the mean of the "TotalDelay" column. 03:48 When you expand the "Operations" menu, in the "Organize" section, you'll find the "Aggregate" operation, which includes the "Mean" function. 04:08 Now you have a new column, called "AverageDelay", that represents the average for the total delay. 04:17 Now to run the data flow and save and create the job. 04:24 Provide a name for the job and continue to the next screen. 04:28 The "Configure" step allows you to review what the input and output of your job run will be. 04:36 And select the environment used to run the job. 04:41 Scheduling a job is optional, but you can set a date and repeat the job, if you'd like. 04:51 And you can choose to receive notifications for this job. 04:56 Everything looks good, so create and run the job. 05:00 This could take several minutes, because remember that the data flow will be run on the full data set. 05:06 In the mean time, you can view the status. 05:12 When the run is compete, you can go back to the "Assets" tab in the project. 05:20 And open the Data Refinery flow to further refine the data. 05:28 For example, you could sort the "AverageDelay" column in descending order. 05:36 Now, edit the flow settings. 05:39 On the "General" panel, you can change the Data Refinery flow name. 05:46 On the "Source data sets" panel, you can edit the sample or format for the source data set or replace the data source. 05:56 And on the "Target data set" panel, you can specify an alternate location, such as an external data source. 06:06 You can also edit the properties for the target, such as the write mode, the file format, and change the data set asset name. 06:21 Now, run the data flow again; but this time, save and view the jobs. 06:28 Select the job that you want to view from the list and run the job. 06:41 When the run completes, go back to the project. 06:46 And on the "Assets" tab, you'll see all three files: 06:51 The original. 06:54 The first refined data set, showing the "AverageDelay" unsorted. 07:02 And the second data set, showing the "AverageDelay" column sorted in descending order. 07:11 And back on the "Assets" tab, there's the Data Refinery flow. 07:19 Find more videos in the Cloud Pak for Data as a Service documentation.
1. Access Data Refinery from within a project. Click New asset > Prepare and visualize data. Then select the data that you want to work with. Alternatively, from the Assets tab of a project, click a data asset to preview it, and then click Prepare data.
2. Use steps to apply operations that cleanse, shape, and enrich your data. Browse operation categories or search for a specific operation, then let the UI guide you. You can enter R code in the command line and let autocomplete assist you in getting the correct syntax. As you apply operations to a data set, Data Refinery keeps track of them and builds a Data Refinery flow. For each operation that you apply, Data Refinery adds a step.
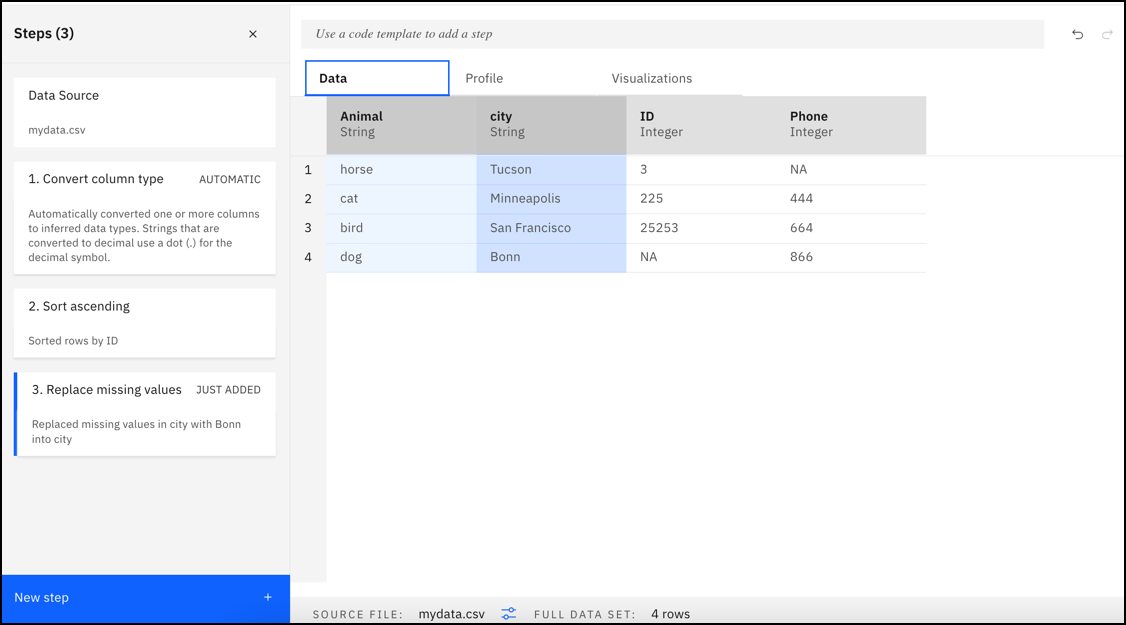
Data tab

If your data contains non-string data types, the Convert column type GUI operation is automatically applied as the first step in the Data Refinery flow when you open a file in Data Refinery. Data types are automatically converted to inferred data types, such as Integer, Date, or Boolean. You can undo or edit this step.
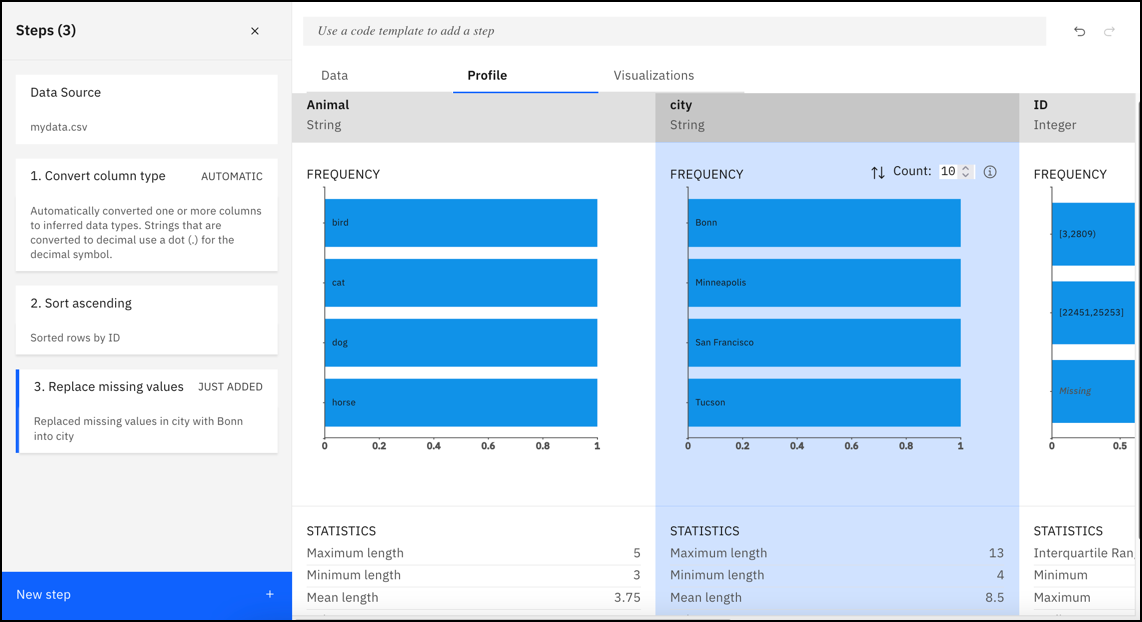
3. Click the Profile tab to validate your data throughout the data refinement process.
Profile tab

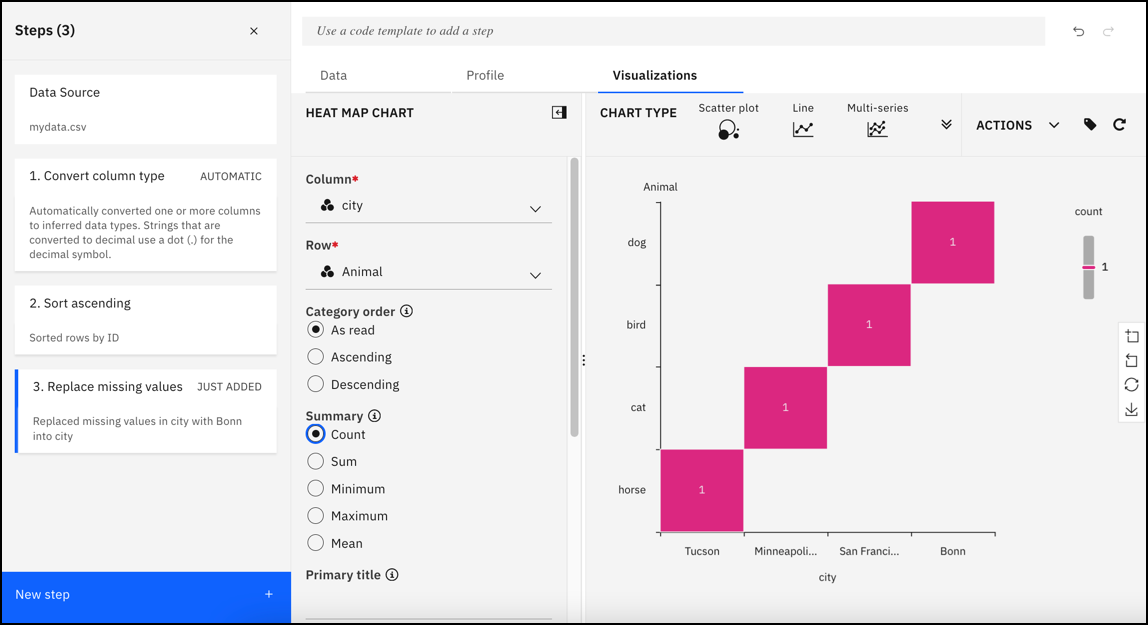
4. Click the Visualizations tab to visualize the data in charts. Uncover patterns, trends, and correlations within your data.
Visualizations tab

5. Refine the sample data set to suit your needs.
6. Click Save and create a job or Save and view jobs in the toolbar to run the Data Refinery flow on the entire data set. Select the runtime and add a one-time or repeating schedule. For information about jobs, see Creating jobs in Data Refinery.
When you run a job for the Data Refinery flow, the entire data set is processed. Thus the job might potentially create a large output (target) dataset based on the transformations, and the amount of data that is processed in the flow. By default, the result of the Data Refinery flow is saved as a data asset in the project.
For the actions that you can do as you refine your data, see Managing Data Refinery flows.
Next step
Learn more
Parent topic: Preparing data